
So, you wanna teach your dog to pull a sled? That sounds like a cool adventure! It’s not just about hooking them up and going, though. There’s a bit of a process to it, making sure your dog is happy and safe. We’ll walk through how to train a dog to pull a sled, covering everything from getting them ready to hitting the trail. It’s a fun journey, and your dog will love it.
Key Takeaways
- Always get your dog checked out by a vet before starting any new exercise, especially something like sled pulling.
- Make sure you have the right gear, like a good harness and leash, to keep your dog comfortable and safe during training.
- Start slow and be patient; positive reinforcement works best for teaching your dog new things.
- Learn how to talk to your dog on the trail using clear words and by understanding their body language.
- Pay attention to your dog’s energy levels and know when to take a break or stop for the day.
Preparing Your Dog for Sled Pulling
Veterinary Consultation and Health Check
Before you even think about hooking your dog up to a sled, a vet visit is non-negotiable. This isn’t just a routine checkup; it’s about ensuring your dog is physically sound for the demands of sled pulling. We’re talking about checking their heart, lungs, joints, and spine. You need to rule out any underlying conditions that could be aggravated by the activity. Think of it like this: you wouldn’t run a marathon without training, and you wouldn’t train if you had a bum knee, right? Same principle applies here. A vet can also advise on breed-specific predispositions to certain ailments. For example, larger breeds are often prone to hip dysplasia. It’s better to know these things upfront. Don’t skip this step!
Nutritional Adjustments for Canine Athletes
Sled pulling is hard work, and your dog’s diet needs to reflect that. You can’t just keep feeding them the same old kibble and expect them to perform like an athlete. They’re going to need more calories, protein, and possibly fat to fuel their muscles and maintain their energy levels. Talk to your vet or a canine nutritionist about switching to a high-performance dog food specifically formulated for active dogs.
Here’s a basic idea of what a diet adjustment might look like:
- Increase protein intake by 20-30%.
- Add healthy fats like fish oil or flaxseed oil.
- Consider supplements like glucosamine and chondroitin for joint support.
Remember, every dog is different. What works for one dog might not work for another. Start slowly with any dietary changes to avoid digestive upset, and monitor your dog’s weight and body condition closely. If they start losing weight or seem sluggish, adjust their food accordingly.
Building Stamina and Endurance
You can’t expect your dog to go from couch potato to sled dog overnight. It’s a gradual process that requires patience and consistency. Start with short walks or runs, gradually increasing the distance and intensity over time. Incorporate activities like hill climbs and pulling light weights to build strength and endurance. Think of it as cross-training for sled pulling.
Here’s a sample training schedule:
- Week 1-2: Short walks (15-20 minutes) with some light jogging.
- Week 3-4: Increase walk/run time to 30-40 minutes, add some hill climbs.
- Week 5-6: Introduce light weight pulling (e.g., a small backpack with water bottles) for short distances.
Pay close attention to your dog’s body language during training. If they seem tired, slow down or stop. It’s better to err on the side of caution than to push them too hard and risk injury. Remember, the goal is to build stamina and endurance gradually, not to break them.
Essential Gear for Sled Dog Training
Before you even think about hooking your dog up to a sled, you need the right equipment. It’s not just about comfort; it’s about safety for both you and your furry friend. Skimping on gear is a recipe for disaster, so let’s talk about what you absolutely need.
Selecting the Right Harness
The harness is arguably the most important piece of equipment. It needs to fit properly and distribute the pulling force evenly across your dog’s body. A poorly fitted harness can cause chafing, pain, and even injury. Look for a harness specifically designed for sledding or pulling, not just a regular walking harness. These harnesses typically have padding in key areas and are designed to allow for a full range of motion. Consider a durable harness from a reputable brand like Neewa.
Choosing a Shock-Absorbing Leash
A regular leash just won’t cut it. The constant jolts and pulls from a sled dog can be hard on your arms and your dog’s neck. A shock-absorbing leash, sometimes called a bungee leash, helps to cushion those sudden movements.
Here’s why it’s important:
- Reduces strain on your joints.
- Minimizes the risk of injury to your dog’s neck and back.
- Provides a smoother, more comfortable experience for both of you.
A good shock-absorbing leash will have a strong bungee section that can stretch and retract smoothly. Make sure the leash is also the right length for sledding; too short, and you’ll be tripping over your dog; too long, and you’ll lose control.
Safety Lights for Low Visibility
If you plan on training in the early morning or late evening, or in areas with low visibility, safety lights are a must. These lights help you see your dog and ensure that others can see you both.
Consider these options:
- Collar lights: Small, lightweight lights that attach to your dog’s collar.
- Harness lights: Lights that integrate directly into the harness.
- Reflective gear: Harnesses, leashes, and even clothing with reflective strips.
Having a dog light is especially important if you’re running near roads or in areas with other traffic. Don’t risk it; be seen!
Understanding Your Dog’s Training Journey
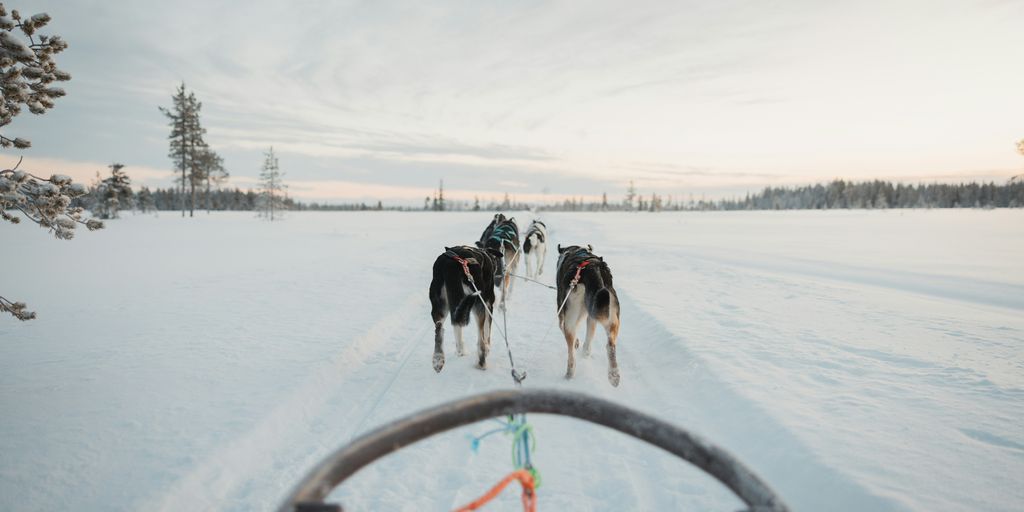
Okay, so you’re ready to get started with sled dog training. That’s awesome! But before you picture yourself gliding through a snowy landscape, it’s important to take a step back and really think about what your dog is experiencing. This isn’t just about teaching commands; it’s about building a partnership and understanding your dog’s limits and capabilities. It’s a journey for both of you, and patience is key. Remember that every dog learns at their own pace, and comparing them to others isn’t helpful. Celebrate small victories and focus on progress, not perfection.
Setting Realistic Expectations
First things first: ditch the Hollywood image of instant success. Sled dog training takes time, consistency, and a whole lot of patience. Don’t expect your dog to be pulling like a pro after a few sessions. Start with short, easy sessions and gradually increase the difficulty as your dog gets stronger and more confident. Consider your dog’s breed, age, and overall fitness level. A smaller dog might not be suited for pulling heavy loads, and an older dog might need more frequent breaks. Be honest about your dog’s limitations and adjust your expectations accordingly. It’s also important to set realistic goals for yourself. Are you aiming for competitive racing, or just a fun winter activity? Your goals will influence your training approach. Remember to check out Canuckle words for some fun facts.
The Power of Positive Reinforcement
Forget old-school methods that rely on punishment or force. Positive reinforcement is the way to go. This means rewarding your dog for good behavior with treats, praise, or toys. Find out what motivates your dog and use it to your advantage. When your dog performs a command correctly, immediately reward them. This helps them associate the command with the desired action. Keep training sessions fun and engaging to keep your dog motivated. If your dog is struggling with a particular command, break it down into smaller steps and reward them for each step.
Here’s a simple example:
- Start with basic obedience commands like "sit," "stay," and "come."
- Introduce the harness and let your dog get used to wearing it.
- Attach a light weight to the harness and have your dog pull it a short distance.
- Gradually increase the weight and distance as your dog gets stronger.
Positive reinforcement isn’t just about giving treats; it’s about building a strong bond with your dog based on trust and respect. When your dog feels safe and supported, they’re more likely to be willing to learn and work with you.
Recognizing Signs of Fatigue
This is super important! Your dog can’t tell you when they’re tired, so it’s up to you to pay attention to their body language. Look for signs like:
- Excessive panting
- Slowing down or stopping frequently
- Dragging their feet
- Loss of enthusiasm
- Changes in gait
If you notice any of these signs, stop the training session immediately and let your dog rest. Pushing them too hard can lead to injuries and burnout. Always prioritize your dog’s well-being over your training goals. Make sure they have access to fresh water and shade during training sessions, especially in warm weather. Remember, a tired dog is not a happy dog, and a happy dog is more likely to enjoy training. Regular breaks are key to effective training.
Mastering Communication on the Trail
Communication is key when you’re out on the trail with your dog. It’s not just about telling them what to do, but also understanding what they’re telling you. It’s a two-way street, and mastering it will make your sled dog training experience much smoother and safer. Think of it as building a shared language that goes beyond simple commands.
Verbal Cues for Direction and Pace
Verbal cues are your primary tool for guiding your dog. Consistency is crucial. Use the same words every time for the same actions. For example, "Hike!" to start, "Whoa!" to stop, and specific commands for turns. Some mushers use "Gee" for right and "Haw" for left – these are traditional and work well, but you can use whatever words you like, as long as you’re consistent. It’s also important to vary your tone to indicate pace. A sharp, energetic tone can encourage speed, while a calm, soothing tone can help slow them down. Teaching basic commands is the first step.
Utilizing Leash Communication
The leash isn’t just a tether; it’s a direct line of communication. Subtle tugs and releases can convey a lot of information. A gentle tug to the side can indicate a turn, while a steady pull can signal a need to slow down. It’s all about developing a feel for how your dog responds to different leash pressures. Think of it as learning to "speak" through the leash.
Reading Your Dog’s Body Language
Your dog is constantly communicating through their body language. Are their ears perked and forward, or are they drooped and back? Is their tail wagging loosely, or is it tucked between their legs? Are they panting excessively, or do they seem relaxed? These are all clues to their physical and mental state. Learning to read these signs is vital for ensuring their well-being and adjusting your training accordingly. If they’re showing signs of fatigue or stress, it’s time to ease up or take a break. It’s also important to pay attention to their gait. A change in their stride could indicate an injury or discomfort.
Paying close attention to your dog’s body language will help you understand their needs and adjust your training accordingly. It’s about building a partnership based on trust and understanding.
The Training Run: From Start to Finish
Pre-Run Warm-Up and Hydration
Before you even think about hooking up the sled, it’s super important to get your dog’s muscles ready. Think of it like stretching before you hit the gym – you wouldn’t want to jump straight into heavy lifting, right? A good warm-up could involve a brisk walk, some light jogging, and maybe even a little play to get the blood flowing. Hydration is also key; make sure your dog has access to fresh water before you head out. I usually bring a collapsible bowl and a water bottle with me. It’s a small thing, but it makes a big difference in preventing dehydration and keeping your dog happy and healthy on the trail. You can also check out puppy training for general tips.
Managing Early Run Excitement
Okay, so you’ve got your dog all geared up, and they’re practically bouncing off the walls with excitement. Totally normal! But you don’t want that energy to turn into chaos. Start slow. Really slow. A controlled walk for the first few minutes can help them burn off some of that initial enthusiasm without going overboard. Talk to them in a calm, reassuring voice. It’s like telling a kid to chill out before a big game. It helps. Also, keep the leash firm but not tight. You want to guide them, not restrain them. This early stage is all about setting the tone for a focused and productive run. Here’s a few things I do:
- Start with a slow walk.
- Use calming verbal cues.
- Maintain a firm but gentle leash.
Finding Your Mid-Run Rhythm
Once the initial excitement has settled, it’s time to find that sweet spot – the rhythm where you and your dog are working together in sync. This is where communication becomes super important. Use your verbal cues consistently to guide their direction and pace. Pay close attention to their body language. Are they pulling too hard? Are they lagging behind? Adjust your speed and commands accordingly. The goal is to find a pace that’s challenging but sustainable, where both of you are comfortable and enjoying the run. It’s all about teamwork, and when you find that rhythm, it’s an amazing feeling.
Remember, every dog is different, and what works for one might not work for another. Be patient, be observant, and be willing to adjust your approach as needed. The most important thing is to create a positive and enjoyable experience for both you and your furry friend.
Addressing Common Training Challenges
Let’s be real, training a dog to pull a sled isn’t always smooth sailing. You’re bound to hit a few snags along the way. It’s all part of the process, and knowing how to handle these common issues can make a huge difference in your dog’s progress and your own sanity. Don’t worry, you’re not alone in this!
Overcoming Initial Resistance to Harnesses
Some dogs just hate wearing harnesses at first. It can feel restrictive or strange to them. The key is to introduce the harness gradually and make it a positive experience. Start by just letting your dog sniff and investigate the harness. Then, try putting it on for short periods inside, rewarding them with treats and praise.
- Associate the harness with fun activities, like going for a walk or playing fetch.
- Make sure the harness fits properly and isn’t too tight or uncomfortable.
- Use high-value treats that your dog loves to create a positive association.
If your dog is really struggling, don’t force it. Take a break and try again later. Patience is key here. You might even want to try a different style of harness if the first one isn’t working out.
Teaching Your Dog to Lead Effectively
Getting your dog to understand the concept of leading can be tricky. They might want to veer off course, get distracted by smells, or simply not understand what you want them to do. Start with basic obedience training, like teaching them to walk nicely on a leash and respond to commands like "forward" and "straight". Use positive reinforcement to reward them when they’re moving in the right direction. Consider using a dog training guide for additional help.
- Use clear and consistent verbal cues.
- Practice in a controlled environment before hitting the trails.
- Reward your dog immediately when they respond correctly.
Handling Distractions on the Trail
The trail can be full of exciting distractions for your dog – squirrels, other dogs, interesting smells, you name it. It’s important to teach your dog to focus on you, even when there’s a lot going on around them. Start by practicing recall in distracting environments. Bring high-value treats and use them to redirect your dog’s attention back to you. Remember, consistency is key.
- Start with short training sessions in low-distraction environments and gradually increase the level of distraction.
- Use a firm but gentle voice to redirect your dog’s attention.
- Reward your dog for ignoring distractions and focusing on you.
| Distraction Type | Strategy |
|---|---|
| Squirrels | Use a strong recall command and reward. |
| Other Dogs | Maintain distance and redirect attention. |
| Smells | Use a |
Maintaining Your Dog’s Well-being
Post-Run Cool Down and Recovery
After a sled-pulling session, your dog’s well-being is paramount. Begin with a gentle cool-down walk to gradually lower their heart rate. Make sure they have access to fresh, cool water immediately. Some dogs will drink right away, while others need a few minutes to catch their breath. Don’t force it.
Here’s a simple post-run checklist:
- Check for any signs of injury, like limping or tenderness.
- Offer water and a small, easily digestible snack.
- Allow them to rest in a cool, shaded area.
It’s important to stay with your dog during their recovery. This allows you to monitor them for any issues and offer reassurance. A little praise goes a long way in reinforcing positive associations with training.
Regular Health Monitoring
Consistent health checks are vital for sled dogs. Keep an eye out for changes in appetite, energy levels, or stool consistency. Regular vet visits are a must, and you should discuss the demands of sled pulling with your vet to ensure your dog is in top condition.
Consider tracking these metrics:
- Weight (weekly)
- Appetite (daily)
- Stool quality (daily)
- Energy levels (daily)
If you notice anything unusual, consult your veterinarian promptly. Early detection of health problems can prevent serious complications. Remember to check the weather conditions before you head out.
Making Training a Positive Experience
Sled dog training should be enjoyable for both you and your dog. Use positive reinforcement techniques, such as praise, treats, and play, to motivate your dog. Avoid punishment or harsh corrections, as these can damage your relationship and make training less effective.
Here are some ways to keep training fun:
- Vary the training routes and activities.
- Incorporate play breaks into the training sessions.
- End each session on a positive note.
Remember, a happy dog is a willing partner. By prioritizing your dog’s well-being, you can create a strong bond and achieve great things together. Don’t forget to reward them with recovery treats after a good run!
Keeping your dog healthy and happy is super important. It’s not just about food and walks; it’s also about making sure they learn good habits and feel safe. Want to learn more about how to give your furry friend the best life? Check out our website for amazing tips and tricks!
Wrapping It Up
So, there you have it. Getting your dog to pull a sled isn’t just about strapping them in and yelling "mush!" It’s a whole process, you know? You’ve gotta start slow, make sure they’re comfortable, and really pay attention to what they’re telling you. It’s like any good relationship, really – communication is key, and a little patience goes a long way. When you finally get that rhythm going, and you’re both moving together, it’s pretty cool. It’s not just about the sledding; it’s about building that bond and having a blast with your best friend. So go on, give it a shot, and have fun out there!
Frequently Asked Questions
How do I know if my dog is ready for sled pulling?
Before you start, it’s super important to take your dog to the vet. They can tell you if your dog is healthy enough for this kind of activity and give you advice on how much exercise they can handle based on their breed, age, and personality. Sometimes, you might even need to change their food to give them more energy, just like human athletes do.
What kind of gear do I need for sled dog training?
You’ll need a special harness that fits well and doesn’t rub or hurt your dog. A leash that can absorb sudden tugs is also a good idea. If you’ll be training when it’s dark or dim, safety lights for your dog are a must so everyone can see them.
What’s the best way to train my dog to pull a sled?
It’s key to start slow and not expect too much too soon. Always praise your dog and give them treats when they do well. Watch them closely for signs they’re getting tired, like heavy panting, and give them a break if they need it.
How can I talk to my dog while we’re training?
You can use your voice to tell your dog where to go, like ‘left’ or ‘right.’ The leash also helps you communicate – your dog can feel your gentle tugs. And pay attention to how your dog acts; their body language will tell you a lot about how they’re feeling.
What should I do during a training run?
Always warm up your dog before you start, maybe by playing a little. When you begin, let them get their initial excitement out, but try to guide them into a steady pace. Expect a few stops, especially at the beginning, for potty breaks.
What if my dog doesn’t want to pull or gets distracted?
If your dog doesn’t like the harness at first, introduce it slowly with treats. To teach them to lead, let them go ahead of you and reward them for staying on track. For distractions, try to train in quiet areas first, then slowly introduce more busy places as they get better.