
Getting your dog involved in obstacle courses, often called agility, can be a really fun way to bond and keep them active. It’s not just for competitive dogs, either; you can set up simple courses at home. This guide will walk you through the steps, from getting the basics down to tackling more complex challenges. We’ll cover how to introduce your dog to different obstacles safely and how to improve your teamwork. Plus, we’ll touch on building your own course and avoiding common training hiccups. Training a dog for obstacle courses is a journey, and it’s all about having a good time together.
Key Takeaways
- Start with solid basic obedience commands before introducing any obstacles. Commands like ‘sit,’ ‘stay,’ and ‘come’ are super important for control.
- Introduce obstacles one by one, beginning with easier ones like low jumps and tunnels. Make sure your dog feels confident and happy with each new item.
- Work on your handling skills, using clear verbal cues and body language to guide your dog. Teamwork makes the whole process smoother and more enjoyable.
- When building your own courses, prioritize safety. Use stable, appropriate materials and start with simple sequences, gradually increasing the difficulty.
- Avoid common mistakes like rushing the training, overworking your dog, or setting unrealistic goals. Patience and positive reinforcement are key to success.
Building a Strong Foundation for Training a Dog for Obstacle Courses
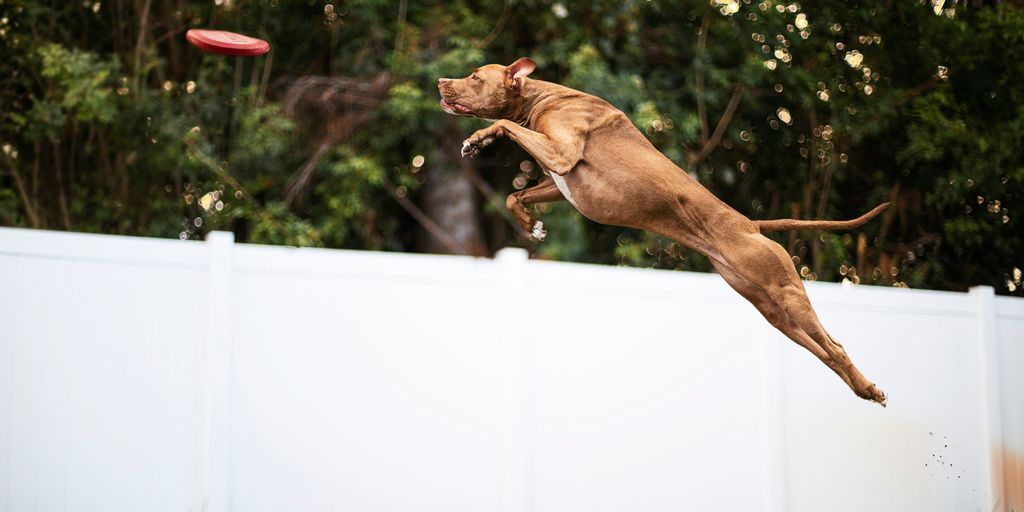
Getting your dog ready for an agility course is a lot like building a house – you need a solid base before you start adding the fancy stuff. Without the right groundwork, things can get wobbly pretty fast. So, let’s talk about what really matters before you even think about jumps or tunnels.
Mastering Basic Obedience Commands
Seriously, this is non-negotiable. Your dog needs to know the basics like ‘sit,’ ‘stay,’ ‘come,’ and ‘down’ like the back of their paw. These aren’t just for polite walks; they’re your communication tools on the course. Imagine trying to get your dog to go through a tunnel if they don’t even listen when you call their name. It’s a recipe for frustration. A dog that reliably responds to commands, even with distractions, is a dog that’s ready to learn agility. Practice these commands everywhere – in the yard, at the park, even with a few friends over. The more they master them in different spots, the better they’ll perform when there’s a whole obstacle course to think about. You can even start practicing basic obedience skills with a leash on, gradually phasing it out as they get better.
Understanding Your Dog’s Physical Readiness
Not every dog is ready to be an agility star the moment they hit adulthood. You’ve got to consider their breed, age, and general health. Puppies, for instance, are still growing, and forcing them into intense training or jumping can really mess up their developing joints. It’s generally recommended to wait until dogs are around 12-18 months old, depending on their size and breed, before really getting into agility. Think about it: would you ask a toddler to run a marathon? Probably not. Same idea here. Check with your vet if you’re unsure about your dog’s physical condition. They can help you figure out if your dog is up for the challenge and what kind of training is appropriate.
The Importance of Positive Reinforcement
This is where the magic happens. Agility training should be fun for both of you, and positive reinforcement is the key to keeping it that way. We’re talking about using treats, praise, and toys to reward your dog when they do something right. Did they look at the jump? Awesome, treat! Did they walk through the tunnel? Amazing, praise! It builds their confidence and makes them want to learn more. It’s all about making them feel good about what they’re doing. If you’re constantly correcting or punishing, you’ll just end up with a dog that’s scared to try. Keep training sessions short, upbeat, and always end on a good note. This approach helps build a strong bond and makes your dog eager to please, which is exactly what you want for dog agility training.
Remember, consistency and patience are your best friends here. Every dog learns at its own pace, and what works for one might not work for another. Celebrate the small wins and don’t get discouraged by setbacks. The goal is to build a positive learning experience that your dog enjoys.
Introducing Your Dog to Agility Obstacles
Alright, so your dog has the basics down, and you’re ready to introduce them to the fun world of agility obstacles. This is where things get really exciting, but it’s also super important to take it slow. Think of it like teaching a kid to ride a bike – you don’t just shove them down a hill, right? We want our dogs to feel confident and happy, not scared or overwhelmed.
Starting with Jumps and Tunnels
Jumps and tunnels are usually the first things dogs encounter in agility. They’re generally pretty straightforward. For jumps, start with the bar really low, maybe just a broomstick across two stacks of books. You want your dog to easily step or hop over it. You can even toss a favorite toy over the jump to encourage them to follow. As they get the hang of it, you can gradually raise the bar a little bit. Remember to praise them a lot! Tunnels are also great for building confidence. Start with a short, straight tunnel. You can lure your dog through with a treat or a squeaky toy. The key is to make it a positive experience from the very start. If your dog is hesitant, don’t force them. Just make it fun and rewarding. You can even have someone on the other side calling them. For more tips on introducing obstacles, check out this guide on dog agility training.
Progressing to Weave Poles
Weave poles can be a bit trickier. Most dogs don’t naturally understand how to weave through a line of poles. A good way to start is by spacing the poles really far apart, almost like individual poles. You can then lure your dog through them, rewarding them after each pole. Some people use a technique where they guide the dog through with treats or a toy. As your dog gets the idea, you can slowly bring the poles closer together. It takes patience, but seeing your dog figure it out is really rewarding.
Navigating Contact Obstacles Safely
Contact obstacles, like the A-frame or the dog walk, are the ones with the bright yellow
Developing Essential Handling Skills for Agility
Alright, so your dog is getting the hang of the individual obstacles. That’s awesome! But agility isn’t just about jumping over things or zipping through tunnels. It’s a team sport, and you, the handler, are a huge part of the equation. You’ve got to learn how to talk to your dog using your body and your voice, guiding them through the course smoothly. It’s like a dance, really, but with more barking and maybe a few slobbery tennis balls involved.
Mastering Verbal Cues and Body Language
Think about how you communicate with your dog every day. You probably use a mix of words, hand gestures, and maybe even a certain tone of voice. In agility, this becomes even more important. You need clear, consistent cues for each obstacle and direction. A sharp "Jump!" for a jump, a "Tunnel!" for the tunnel, and maybe a specific hand signal to tell them which way to go next. The key is consistency; your dog needs to know exactly what each cue means, every single time. It’s not just about the words, though. Your body position matters a lot. Where you are on the course, how you move, and even where you’re looking can tell your dog what’s coming up. Learning to use your body language effectively is a big part of helping your dog succeed.
Understanding Handling Lines and Dog’s Perspective
This is where things get really interesting. Courses aren’t just a straight line from point A to point B. They twist and turn, and your dog has a natural way of moving through them. This is called their ‘line’. You need to learn to see the course from your dog’s point of view. What path will they naturally take? Where will they look? By understanding these handling lines, you can position yourself to guide them efficiently. For example, if you know your dog tends to cut a corner too sharply, you might position yourself on the outside of that turn to encourage a wider, smoother arc. It’s about anticipating their movement and helping them stay on the best path, rather than just pointing them at each obstacle.
Practicing Turns and Transitions
Turns and transitions are where many teams lose time or have mistakes. A smooth turn means your dog can maintain speed and momentum. This often involves you being in the right place at the right time to encourage the correct angle. Think about how you might signal a turn – maybe a slight body shift or a specific arm movement. Transitions are about moving from one obstacle to the next. How do you get your dog from a tunnel exit to a jump smoothly? It often comes down to your position and the cues you give right after the previous obstacle. Practicing these sequences, even just two obstacles at a time, helps build that teamwork and understanding. You might find that working on S-lines in dog agility requires specific attention to these transition skills.
You’re not just telling your dog what to do; you’re showing them. Your body is a map, and your movements are the directions. Learn to read your dog’s cues and use your own body to create clear pathways. This partnership is what makes agility so rewarding.
Designing and Building Your Own Obstacle Courses
So, you’ve got your dog hooked on agility and now you’re thinking about setting up your own training space? That’s awesome! Building your own course can be a really rewarding way to keep your dog engaged and progressing. It doesn’t have to be super fancy or expensive, either. You can get pretty creative with everyday items.
Creating Safe and Engaging Obstacles at Home
When you’re building things yourself, safety is the number one thing to keep in mind. You don’t want your dog getting hurt, right? Think about using sturdy but lightweight materials. For jumps, you could use PVC pipes or even broomsticks balanced on some sturdy buckets. Just make sure they’re not too high to start and that they’ll fall over easily if bumped, rather than causing a trip hazard. Tunnels are pretty easy – a kid’s play tunnel or even a large cardboard box works great. For weave poles, you can use things like traffic cones or even just stakes placed in the ground. Just remember to space them correctly as your dog gets better.
- Jumps: Use lightweight poles and adjustable stands. Start low!
- Tunnels: Cardboard boxes or fabric tunnels are perfect.
- Weave Poles: Cones or PVC pipes, spaced appropriately.
- Contact Obstacles: Start with low planks or ramps, ensuring a gentle slope.
Always check your homemade obstacles for stability and smooth edges. Your dog’s safety comes first, always.
Sequencing Obstacles for Progressive Training
Once you have a few obstacles, the fun part is putting them together. Start simple. Maybe a tunnel followed by a jump. Or a jump, then a weave pole sequence. The key is to build up gradually. Don’t throw a super complicated sequence at your dog right away. You want them to succeed and feel confident. As they master a sequence, you can add another obstacle or change the order. This keeps things fresh and challenging for them. Think about how you’ll guide them through it, too. Your body language and cues are super important here. You can find some great DIY agility A-frame plans online if you’re feeling ambitious.
Adapting Courses for Different Skill Levels
What works for a beginner won’t work for an advanced dog, and vice versa. So, when you’re designing your course, think about how you can adjust it. For newer dogs, keep jumps low, tunnels short and straight, and weave poles spaced wider. As your dog gets more experienced, you can increase jump heights, use longer or curved tunnels, and narrow the spacing on the weave poles. You can also change the direction of turns and the types of transitions between obstacles. It’s all about meeting your dog where they are and helping them improve step by step. This adaptability is what makes a home course so useful for long-term training.
Enhancing Performance with Advanced Techniques
Once your dog has a good grasp of the basics, it’s time to really start refining their performance. This is where we move beyond just getting through the obstacles and start thinking about how to make those runs faster, smoother, and more efficient. It’s about building a partnership where you and your dog are working together like a well-oiled machine.
Improving Speed and Collection
Getting faster isn’t just about running hard; it’s about running smart. Collection is a key concept here. It means your dog is able to shorten their stride and adjust their body position to make tighter turns or prepare for an obstacle without losing momentum. Think of a sprinter adjusting their form before a final push. You can work on this by practicing short, sharp turns after a jump or tunnel, rewarding your dog for staying balanced and controlled. The goal is to teach your dog to anticipate your cues and adjust their body proactively.
Mastering Tunnel Exits and Send-Aheads
Tunnel exits are often tricky. Your dog is coming out of a dark tunnel and needs to know where to go next. This is where your handling really matters. You need to be in the right place, using your body language and verbal cues to guide them. A good ‘send-ahead’ cue tells your dog to go directly to the next obstacle, even if you’re not right beside them. Practicing this with a clear visual marker or a strong verbal cue can make a huge difference. It’s about building trust so your dog knows to follow your direction.
Developing Independent Obstacle Performance
This is about building your dog’s confidence to perform obstacles even when you’re not right there with them. It means your dog can take a jump or go through a tunnel without you needing to be right at their side. You can start by practicing with a longer lead or by having them perform an obstacle while you stand a short distance away. Gradually increase the distance and complexity. This allows you to focus on your own movement and handling strategy for the next part of the course. It’s a big step in becoming a truly effective agility team, allowing you to focus on layering techniques in dog agility without your dog getting lost.
Building independence takes time and patience. It’s about setting your dog up for success at every step, celebrating small wins, and always keeping training fun and positive. Remember, your dog is learning to trust your cues and their own abilities.
Common Pitfalls in Training a Dog for Obstacle Courses
It’s easy to get excited when you start agility training with your dog, and sometimes that excitement can lead us down the wrong path. We all want our pups to be agility stars, but rushing things is a surefire way to cause problems. The biggest mistake most people make is moving too fast. It’s like trying to run a marathon without training for a 5k first – it just doesn’t work out well.
Avoiding Rushing Obstacle Introduction
Think about it: you wouldn’t ask a toddler to solve complex math problems on their first day of school, right? Dogs are similar. Throwing them onto a weave pole set or a wobbly seesaw before they’re ready can be really confusing and even scary for them. This can lead to a fear of the equipment, which is a tough habit to break. Instead, introduce one obstacle at a time. Let your dog sniff it, walk around it, and maybe even get a treat just for being near it. Once they’re comfortable, you can start asking them to interact with it, like walking through a tunnel or hopping over a low bar. Building confidence with each step is key. If your dog seems hesitant, that’s a sign to slow down, not push harder. Remember, a happy dog is a dog that wants to play and learn.
The Dangers of Overtraining and Burnout
Another common trap is the "more is better" mentality. While consistency is important, training for too long or too intensely can actually be counterproductive. Dogs, just like us, can get tired and mentally fatigued. Pushing them past their limits can lead to burnout, where they lose interest, become frustrated, or even start to associate training with unpleasant feelings. Signs of burnout can include a lack of enthusiasm, increased mistakes, or even avoidance of training altogether. Keep sessions short and fun, especially in the beginning. A good rule of thumb is to end on a positive note, when your dog is still engaged and having fun, rather than when they’re tired or bored. This helps maintain their motivation for future training. It’s better to have several short, positive sessions throughout the week than one long, exhausting one.
Setting Realistic Expectations for Progress
Finally, let’s talk about expectations. Every dog is an individual, and they learn at their own pace. Some dogs might pick up new skills incredibly quickly, while others might need more time and repetition. Comparing your dog to others, especially those you see online or at competitions, can be discouraging. It’s important to celebrate your dog’s successes, no matter how small they seem. Did they finally look at the weave poles without barking? That’s progress! Did they walk through the tunnel for the first time? Huge win! Focus on your dog’s journey and their individual improvements. This positive outlook will not only make the training process more enjoyable for both of you but also build a stronger bond based on trust and mutual respect. Patience and a positive attitude are your best tools here. You can learn more about improving your dog’s start line stay to help with overall progress.
When training your dog for obstacle courses, it’s easy to get tripped up by common mistakes. Many owners forget to focus on positive reinforcement, which is key to building your dog’s confidence and making training fun. Instead of getting frustrated, remember that patience and the right techniques make all the difference. Want to learn more about building a strong training foundation for your furry friend? Visit our website for expert tips and guidance!
Keep Practicing and Have Fun!
So, you’ve learned a lot about getting your dog ready for agility. Remember, it’s not just about the fancy jumps or weaving through poles. It’s about building a strong connection with your dog and having a good time together. Start with the basics, be patient, and celebrate every little win. Whether you’re aiming for competitions or just want a fun way to bond and keep your dog active, agility is a fantastic journey. Keep training, keep playing, and most importantly, enjoy the process with your best friend.
Frequently Asked Questions
What are the first steps to training my dog for an obstacle course?
Start with basic obedience like ‘sit,’ ‘stay,’ and ‘come.’ Then, introduce simple obstacles like low jumps and short tunnels. Always use positive reinforcement like treats and praise to make it fun!
When is my dog old enough to start agility training?
It’s best to wait until your dog is about 12 to 18 months old. This is when their bones and joints are fully grown, making it safer for them to do more challenging activities.
Can I build my own agility obstacles at home?
You can make your own obstacles using things like PVC pipes for jumps, cardboard boxes for tunnels, and cones for weave poles. Just make sure everything is safe and sturdy!
How do I guide my dog through the obstacle course?
Focus on clear signals and body language. Your dog needs to understand where you want them to go, even when they’re excited. Practice guiding them around obstacles one by one.
What are common mistakes to avoid when training my dog?
Avoid introducing obstacles too quickly, and don’t overwork your dog. Take breaks and make sure training is always a positive experience. Every dog learns at its own speed, so be patient!
What are the benefits of agility training for my dog?
Agility training is great for exercise and mental stimulation, which can help prevent boredom and destructive behaviors. It also builds a stronger connection between you and your dog!