
Taking pictures of your dog can be a blast, but getting them to cooperate? That’s a whole different story. If you’ve ever tried snapping a photo of your furry friend, you know it can be a challenge. Luckily, with some training and a bit of patience, you can learn how to train a dog for photoshoots. This guide will walk you through the basics of understanding your dog, setting up the perfect shoot, and capturing those adorable moments that make you smile.
Key Takeaways
- Understanding your dog’s body language helps in creating a comfortable environment.
- Positive reinforcement is key to training your dog for photoshoots.
- Choosing the right location can make or break your photo session.
- Patience is essential when trying to capture the perfect shot.
- Incorporating fun tricks can add a unique flair to your photos.
Understanding Your Dog’s Behavior
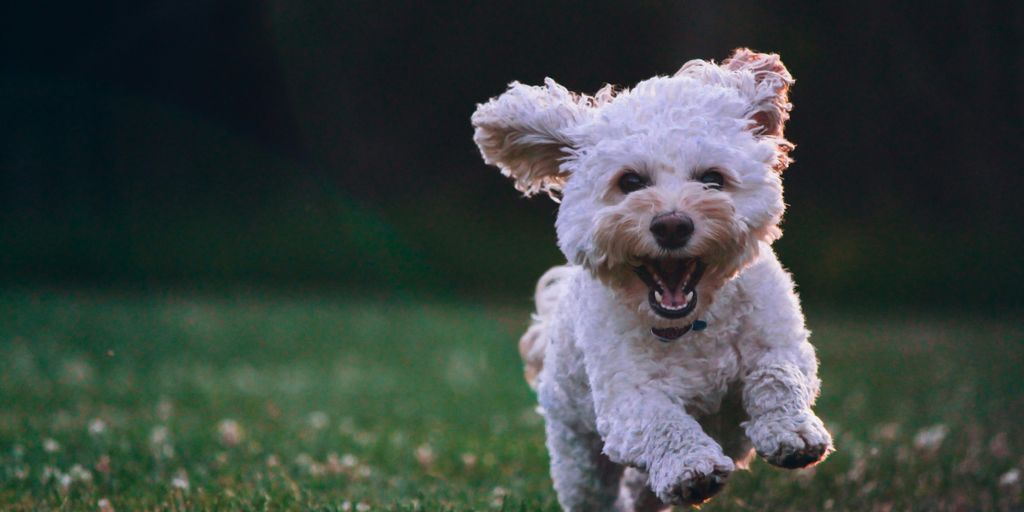
Before you even think about picking up your camera, it’s super important to get a handle on how your dog ticks. You can’t expect to get amazing photos if your dog is stressed, scared, or just plain confused. It’s all about understanding their signals and creating a positive experience.
Recognizing Body Language
Dogs can’t talk (obviously), so you have to become fluent in dog body language. Are their ears perked up and tail wagging loosely? That’s a good sign! But if their tail is tucked, they’re panting excessively, or their eyes are showing a lot of white, they’re probably not having a good time. Pay close attention to these cues; it’s how they communicate their comfort level. If you see signs of stress, back off and try again later. It’s better to have no photos than to make your dog miserable.
Identifying Triggers
What makes your dog nervous or excited? Loud noises? Strangers? Other dogs? Knowing your dog’s triggers is key to a successful photoshoot. If they’re afraid of cars, don’t try to take photos near a busy street. If they get overly excited around other dogs, maybe choose a location where you’re less likely to encounter them. You might want to consider dog personality before you start.
Building Trust and Comfort
Trust is everything. Your dog needs to feel safe and comfortable around you, especially when you’re waving a weird object (the camera) in their face. Spend time just hanging out with your dog, giving them treats, and talking to them in a soothing voice. Make sure they associate the camera with positive experiences.
Remember, patience is key. Don’t rush the process. The more comfortable your dog is, the better the photos will be. If they’re having fun, it will show in their expressions, and that’s what makes a great pet photo!
Essential Training Techniques for Photoshoots
Getting your dog ready for a photoshoot isn’t just about snapping a quick picture; it’s about creating a positive and cooperative experience. It’s like teaching them a new game, where the reward is attention and maybe a tasty treat. The more prepared you are, the smoother the session will go, and the better the photos will turn out. Think of it as building a foundation for future, even more elaborate, photoshoots.
Positive Reinforcement Methods
Positive reinforcement is key. It’s all about rewarding the behaviors you want to see repeated. Instead of scolding your dog for not sitting still, praise and treat them when they do. This creates a positive association with the photoshoot, making them more likely to cooperate in the future. It’s also important to be consistent with your commands and rewards. If "sit" always means sit, and sit always gets a treat (at least initially), your dog will learn much faster.
Clicker Training Basics
Clicker training can be a super effective way to communicate with your dog during a photoshoot. The clicker sound becomes a marker for the exact moment they perform the desired behavior. It’s like saying, "Yes, that’s exactly what I wanted!" followed by a treat.
Here’s a basic breakdown:
- Charge the clicker: Pair the click with a treat repeatedly so your dog associates the sound with something positive.
- Give a command: Ask your dog to sit.
- Click: The instant they sit, click the clicker.
- Reward: Immediately give them a treat.
The timing is important. The click should happen during the desired behavior, not after. This helps your dog understand exactly what they’re being rewarded for. It might seem a little silly at first, but it can make a huge difference in how quickly your dog learns.
Using Treats Effectively
Treats are a photographer’s best friend, but it’s important to use them strategically. You don’t want your dog to become so focused on the treats that they ignore everything else. Consider these points:
- Use high-value treats: Save the really good stuff (like small pieces of chicken or cheese) for the photoshoot. Dog training books often recommend this.
- Vary the reward: Sometimes give a treat, sometimes offer praise, sometimes a quick play session. This keeps things interesting.
- Fade the treats: As your dog becomes more reliable with their commands, gradually reduce the frequency of treats, replacing them with praise and affection. This prevents them from becoming entirely dependent on food.
| Treat Type | Use Case | Frequency |
|---|---|---|
| High-Value (Chicken, Cheese) | New commands, difficult poses | Frequent initially, then reduced |
| Medium-Value (Dog biscuits) | Known commands, maintaining focus | Moderate |
| Low-Value (Kibble) | Easy commands, general reinforcement | Infrequent |
Creating a Comfortable Photoshoot Environment
It’s super important to make sure your dog is relaxed and happy during a photoshoot. A stressed dog won’t cooperate, and the photos will show it. Think about it – would you want your picture taken if you were nervous or uncomfortable? Probably not!
Choosing the Right Location
The location can make or break a photoshoot. Avoid places that are too crowded, noisy, or have a lot of distractions. Parks can be okay, but maybe not on a busy Saturday. A quiet studio or even your own backyard might be a better choice. Consider your dog’s personality. If they’re easily spooked, an indoor setting is best. If they love to run, a large, enclosed outdoor area could work. Just make sure it’s safe and secure!
Setting Up for Success
Think about what your dog needs to feel comfortable. Bring their favorite bed or blanket. Have water and treats readily available. If they’re used to a crate, having it nearby can provide a sense of security. Before you even pick up the camera, let your dog explore the space and get used to the surroundings. This helps them relax and associate the location with positive things. Remember those dog photography workshops? They often emphasize creating a calm environment.
Minimizing Distractions
Distractions are the enemy of a good photoshoot. Turn off your phone, ask family members to stay out of the area, and try to eliminate any loud noises. If your dog is easily distracted by other animals, choose a location where they won’t be around. You might even want to use a white noise machine or play calming music to help drown out external sounds. The goal is to keep your dog’s attention focused on you and the task at hand.
A calm and controlled environment is key to capturing great photos of your dog. It allows their personality to shine through and makes the whole experience more enjoyable for everyone involved.
Here’s a quick checklist to help minimize distractions:
- Turn off your phone.
- Ask others to give you space.
- Eliminate loud noises.
- Choose a distraction-free location.
- Use calming aids if needed.
Capturing the Perfect Shot
Timing and Patience
Okay, so you’ve got your dog trained, the location is set, and you’re ready to go. Now comes the real test: actually getting that amazing shot. Timing is everything. You might have to wait for the perfect ear twitch, a playful glint in their eye, or just a moment of stillness. Don’t rush it! Patience is key. I’ve spent entire afternoons waiting for my dog, Max, to just look at the camera for a split second. It’s all part of the process.
Using Natural Light
Forget fancy studio lights (at least for now). Natural light is your best friend.
- Shoot during the golden hours (early morning or late afternoon) for soft, warm light.
- Avoid direct sunlight at midday, which can create harsh shadows.
- Use reflectors to bounce light and fill in shadows.
I once tried to use a flash indoors, and it completely freaked out my dog. Natural light is so much gentler and creates a more pleasing effect, anyway. Plus, it’s free!
Experimenting with Angles
Don’t just stand there and snap away from eye level. Get down low! Shoot from above! Try different angles to see what works best for your dog’s unique features. A low angle can make a small dog look majestic, while an overhead shot can emphasize their goofy personality. It’s all about playing around and finding what looks good. Think about [dog photography skills](#5248] and how they can help you get the best shot.
Incorporating Tricks and Commands
Teaching Basic Commands
Basic commands are the building blocks for more complex tricks and poses. Think of it like this: a solid "sit," "stay," and "down" are the foundation upon which you’ll build your dog’s photogenic repertoire. Start with short training sessions, no more than 5-10 minutes, and always end on a positive note. Use high-value treats and plenty of praise to keep your dog motivated. Remember, consistency is key! If you only practice these commands sporadically, your dog won’t retain them as well. Make it a part of your daily routine, even if it’s just for a few minutes at a time. This will not only improve their obedience but also strengthen your bond, making them more receptive to learning new things for the camera. You can use positive reinforcement methods to help with this.
Fun Tricks for Unique Shots
Once your dog has mastered the basics, it’s time to get creative! Teaching fun tricks can add personality and flair to your photos. Consider tricks like "shake," "play dead," or even something as simple as "wave." These tricks not only look adorable but also showcase your dog’s intelligence and personality. When teaching tricks, break them down into small, manageable steps. For example, to teach "play dead," start by having your dog lie down. Then, gently guide them onto their side, rewarding them as they get closer to the desired position. Gradually increase the duration they hold the pose before giving the treat. Be patient and celebrate small victories along the way.
Using Props and Toys
Props and toys can be fantastic tools for capturing engaging and dynamic photos. A favorite toy can be used to capture action shots, like jumping or catching. A well-placed prop, such as a hat or pair of sunglasses (worn safely and briefly, of course!), can add a touch of whimsy and humor. When introducing props, do so gradually and positively. Let your dog sniff and investigate the item before asking them to interact with it. Always supervise your dog when using props to ensure their safety. Some dogs might try to chew or swallow small items, so it’s important to choose props that are safe and appropriate for their size and temperament.
Remember to keep the sessions fun and engaging. If your dog starts to lose interest or becomes frustrated, take a break and try again later. The goal is to create a positive association with the camera and the training process, so your dog enjoys participating in the photoshoot.
Post-Photoshoot Care and Review
Cooling Down After a Session
After all the excitement of a photoshoot, it’s super important to help your dog relax and cool down. Think of it like an athlete after a big game – they need to recover! Make sure they have access to fresh water and a quiet, shady spot to chill out. Avoid any strenuous activity immediately after. A gentle massage or some light petting can also help them unwind. It’s also a good idea to check them for any signs of stress or discomfort, like excessive panting or limping. If you notice anything unusual, it’s always best to consult with your vet. Remember, a happy and healthy dog is the ultimate goal!
Reviewing and Selecting Photos
Okay, so you’ve got a ton of photos – now what? Time to sift through them and pick out the best ones! This can be a bit overwhelming, but here’s my approach. First, I do a quick cull, deleting any obviously blurry or poorly lit shots. Then, I focus on the ones where my dog’s personality really shines through. Look for those candid moments, the goofy expressions, and the genuine connections. Don’t be afraid to get a second opinion from a friend or family member.
Here’s a simple way to organize your photos:
- Create a folder for "keepers."
- Use a rating system (stars or flags) in your photo software.
- Write short notes about each photo to remember the context.
It’s easy to get caught up in technical perfection, but remember that the best photos are the ones that capture the essence of your dog. Don’t be afraid to embrace imperfections and focus on the emotions they evoke.
Maintaining a Positive Experience
This is probably the most important part! You want your dog to associate photoshoots with positive experiences, not stress or anxiety. Always end the session on a good note, even if you didn’t get the perfect shot. Give them lots of praise, treats, and cuddles. Avoid pushing them too hard or getting frustrated if they’re not cooperating. If they seem uncomfortable or stressed, take a break or end the session altogether. Remember, it’s all about building trust and creating a fun, enjoyable experience for both of you. Consider positive reinforcement to keep your dog happy and engaged during future sessions. A happy dog makes for better photos, and more importantly, a stronger bond!
Continuing Education in Pet Photography
It’s easy to think you’ve learned all there is to know, but the world of pet photography is always changing! New techniques, equipment, and trends emerge all the time. Staying up-to-date is key to improving your skills and keeping your work fresh. Continuing your education ensures you’re always growing as a photographer.
Workshops and Courses
Workshops and courses are a great way to get hands-on experience and learn from experts. You can find workshops that focus on specific areas, like lighting, posing, or editing. Courses often provide a more structured learning environment, covering a wide range of topics in detail. Look for instructors with a strong background in pet photography and a teaching style that suits you. A good workshop can really help you master your positioning and improve your skills.
Online Resources and Communities
The internet is full of resources for pet photographers. Websites, blogs, and YouTube channels offer tutorials, tips, and inspiration. Online communities, like forums and social media groups, provide a space to connect with other photographers, share your work, and get feedback. Just be sure to check the source’s credibility before taking advice as gospel. Some great resources include:
- Photography blogs
- Online photography courses
- Social media groups for pet photographers
Networking with Other Photographers
Connecting with other photographers can be incredibly beneficial. You can learn from their experiences, get feedback on your work, and even collaborate on projects. Attend local photography events, join online communities, or reach out to photographers whose work you admire. Networking can open doors to new opportunities and help you grow as a photographer.
Being part of a community is so important. It’s not just about learning new tricks, but also about finding support and inspiration. Sharing your struggles and successes with others who understand can make a huge difference in your journey as a pet photographer.
If you want to take your pet photography skills to the next level, continuing education is key! There are many online courses and workshops that can help you learn new techniques and improve your craft. Whether you’re a beginner or looking to refine your skills, there’s something for everyone. Don’t miss out on the chance to grow as a photographer! Visit our website to explore the best resources available for pet photography education today!
Wrapping It Up
So there you have it! Training your dog for photoshoots can be a fun and rewarding experience for both of you. With a little patience and practice, you can capture those perfect moments that showcase your dog’s personality. Remember, it’s all about having fun and building a bond with your furry friend. Whether you’re just snapping pictures for fun or aiming for something more professional, the key is to enjoy the process. So grab your camera, get out there, and start creating some amazing memories with your pup!
Frequently Asked Questions
How can I get my dog to pose for pictures?
Start by teaching your dog basic commands like ‘sit’ or ‘stay’. Use treats to reward them when they follow your instructions. This will help them understand what you want.
What should I do if my dog seems nervous during a photoshoot?
Make sure your dog feels comfortable. Bring their favorite toys or blanket to the photoshoot. Take breaks and give them plenty of love and praise to help them relax.
What are the best locations for dog photography?
Look for places that are safe and have good lighting. Parks, beaches, or your backyard can be great spots. Just make sure there are not too many distractions around.
How can I capture the best moments of my dog?
Be patient and ready to click the shutter at the right time. Watch your dog’s behavior and be ready to take pictures when they are playing or being silly.
Should I use treats during the photoshoot?
Yes! Treats can help get your dog’s attention and make them more willing to pose. Just be sure to use them wisely so your dog stays focused.
What should I do after the photoshoot?
Give your dog some time to cool down and relax. Then, go through your photos and pick your favorites. Always make sure your dog had a fun time!